 |
| Three sizes of crimp rings |
It's pouring rain here in New Hampshire today. I know that the midwest is going to have white Christmas but ours is still up in the air or should I say in the White Mountains, lol. It's a good day to stay inside read, sew, pick up a crochet hook or start knitting a pair of socks--or, maybe it's a good day to go out in the garage and make a Christmas wreath.
So Let's Get Started...
You have your supplies, tools, your greens are gathered or purchased, you've found and cleared a work space and you're dressed appropriately---warmly if working in an unheated garage or shed and dressed in your yard duds or clothes that you don't mind getting dirty. I guess that means we're ready to make a Christmas wreath!
 |
| This is about the amount of greens I pick for a 12" wreath |
 |
| Wire knot |
For a little added holiday atmosphere, I like to have a hot cup of coffee or hot chocolate (w/a candy cane and marshmallows) nearby and a little Christmas music playing while I'm working. It's also fun to make a pot of veggie soup and invite a friend over for an afternoon of making wreaths and merry!
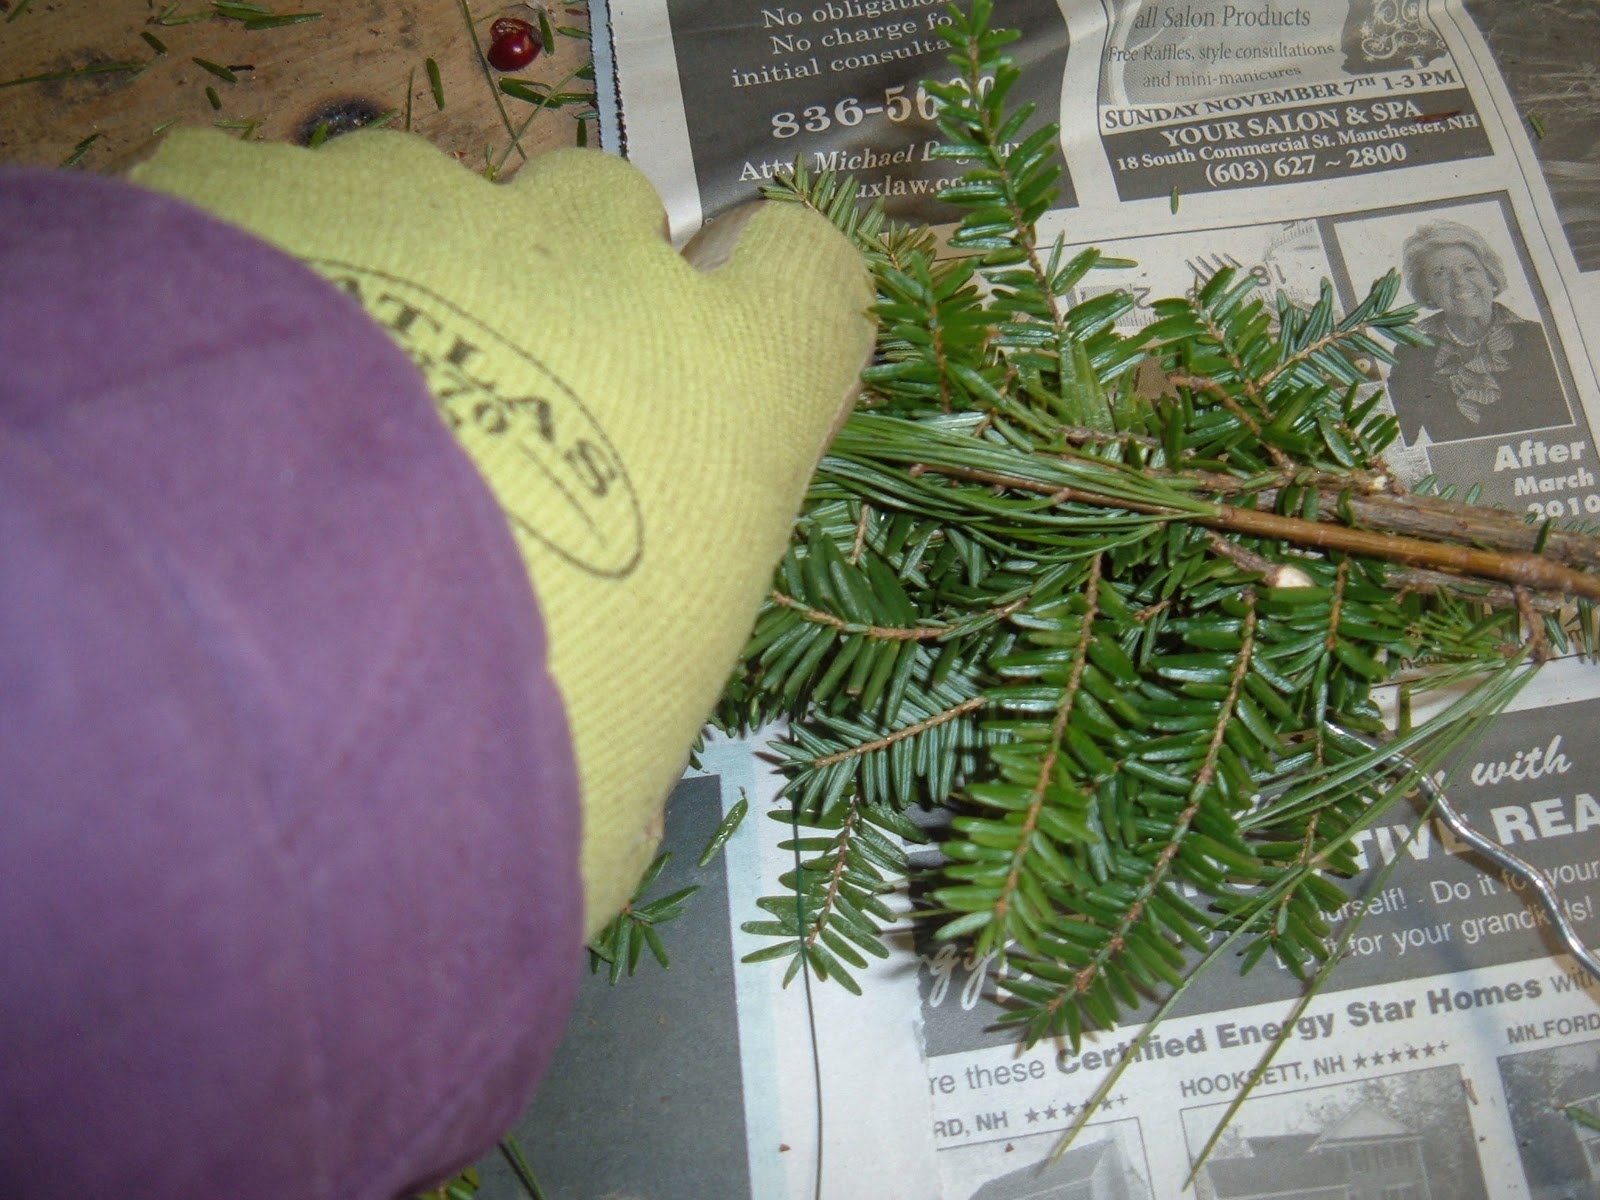
 The first thing you have to do is attached your wire. Take the paddle of wire and unwrap about a foot of it. Then take the loose end and tie a knot around the crimp ring as shown in the above photo. You might need to use a pair of pliers to help you pull the knot so that it's tight against the ring but you shouldn't pull tight enough to break the wire. Once you have the wire tied to the ring, wrap the remaining loose end of the wire around the ring.
 Now take a good-sized bunch of greens in your hand. I like to use all of the evergreen branches that I cut but I use the "tips" (the ends of the branches which are usually the fullest and greenest). I put these "tips" on the top of my bundles.
The length of the greens should be about six to eight inches but don't cut them exactly or measure them. Winding in a few longer stems gives the wreath stability. Use a good thick handful of greens. If I have any that are broken or missing needles I put them at the back of my bunch. I use almost everything that I cut. Don't think the commercial guys don't use the twigs and broken branches because they do. The thicker your bundles the fuller your wreath will be.
Take your bunch of greens and hold it against the ring and with your right hand take the paddle of wire and make several tight wraps around the greens and the ring. I give a few extra winds down along the stems and then wind back up to the green part again. [You can see this in the picture]. I work from left to right, but you can do right to left if that works better for you.

The first bunch should be fairly tight, you don't want your greens loose enough to roll around the ring. I normally give a slight tug to my wire each time I wrap it.
Now grab your second bunch of greens and slightly overlap it on the first so that it hides the stems of the first bunch but doesn't leave any gaps and take several more wraps with the wire. Make sure you are giving the wire a slight tug after each wrap so that your greens are securely attached. Here is where I sometimes like to add another type of greenery. In this picture I'm adding a few white pine tassels, sometimes I add holly or bunches of rose hips--get creative. Once you learn how to make a wreath you can weave in any type of greenery you want, even artificial greens.

Below you can see that I use a good handful of greens and woody stems to add strength and bulk to the wreath. Because I place them behind my green bunches, you don't see them. anyway.
Continue adding more bunches and overlapping them until you are about six inches from where your wreath begins.
 |
| This wreath is about halfway done. |
See how full and pretty it is? If you find any greens that stick out too far or that are brown, you can snip them off with a scissors and no one will ever be the wiser. I have friends that trim their store bought wreaths.
When you get to the last six inches, you should tie back the greens at the starting point so that you don't wrap over them again. I use a twist tie for this.
In the picture below, you can see I'm pretty close to the my starting point so now I'm making my bunches a lot shorter and working them under the starting point. Here is where I usually tie the greens at the starting point back so that they don't get caught in the wire. From here on, you have to weave the wire underneath starting point when you wrap and bring it back towards your last bunch, adding & overlapping another smaller bunch, wrapping and weaving, etc. until there's no more room to add anymore greens.
Cut the wire leaving about 10 inches free and turn the wreath over. Weave the end of the wire through the stems and wire on the back of the wreath as far as you can. I sometimes use a large eye needle and needle nose pliers to do this.
 |
| This is where the end meets the starting point. |
Don't worry if the place where you started/stopped is more obvious than you'd like. Normally that's where you will tie your bow anyway. To give you ideas, here are pictures of some of the wreaths I've made so far this holiday season.
 |
| Wreath for my parents front door |
 |
| Wreath made for my daughter's house |
your wreaths are gorgeous...thanks for the tutorial :) and thanks for dropping by my site...i always enjoy making new friends!
ReplyDelete